This article describes how to create purchase orders. Purchase orders allow you to track your parts purchases throughout the ordering process. You can send your purchase orders to your vendors directly by email and be notified when a delivery is late. You can get notifications when a PO is created, a comment is added to a PO or the status of a PO changes. You will also be able to generate detailed reports on your parts costs, by vendor or other parameters.
To access the purchase order management window, in the "Parts and Inventory" section of the "General" tab, click on the "Purchase Orders" menu: 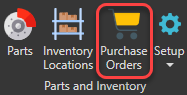
The Purchase Order Management window will appear:
 List of Purchase OrdersThe list of purchase orders. According to the state of the button Hide 'Completed', completed purchase orders may be hidden. |
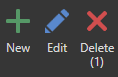
 Action ButtonsSpecial action buttons. Depending on the state of the selected purchase order, the action buttons displayed will be different.
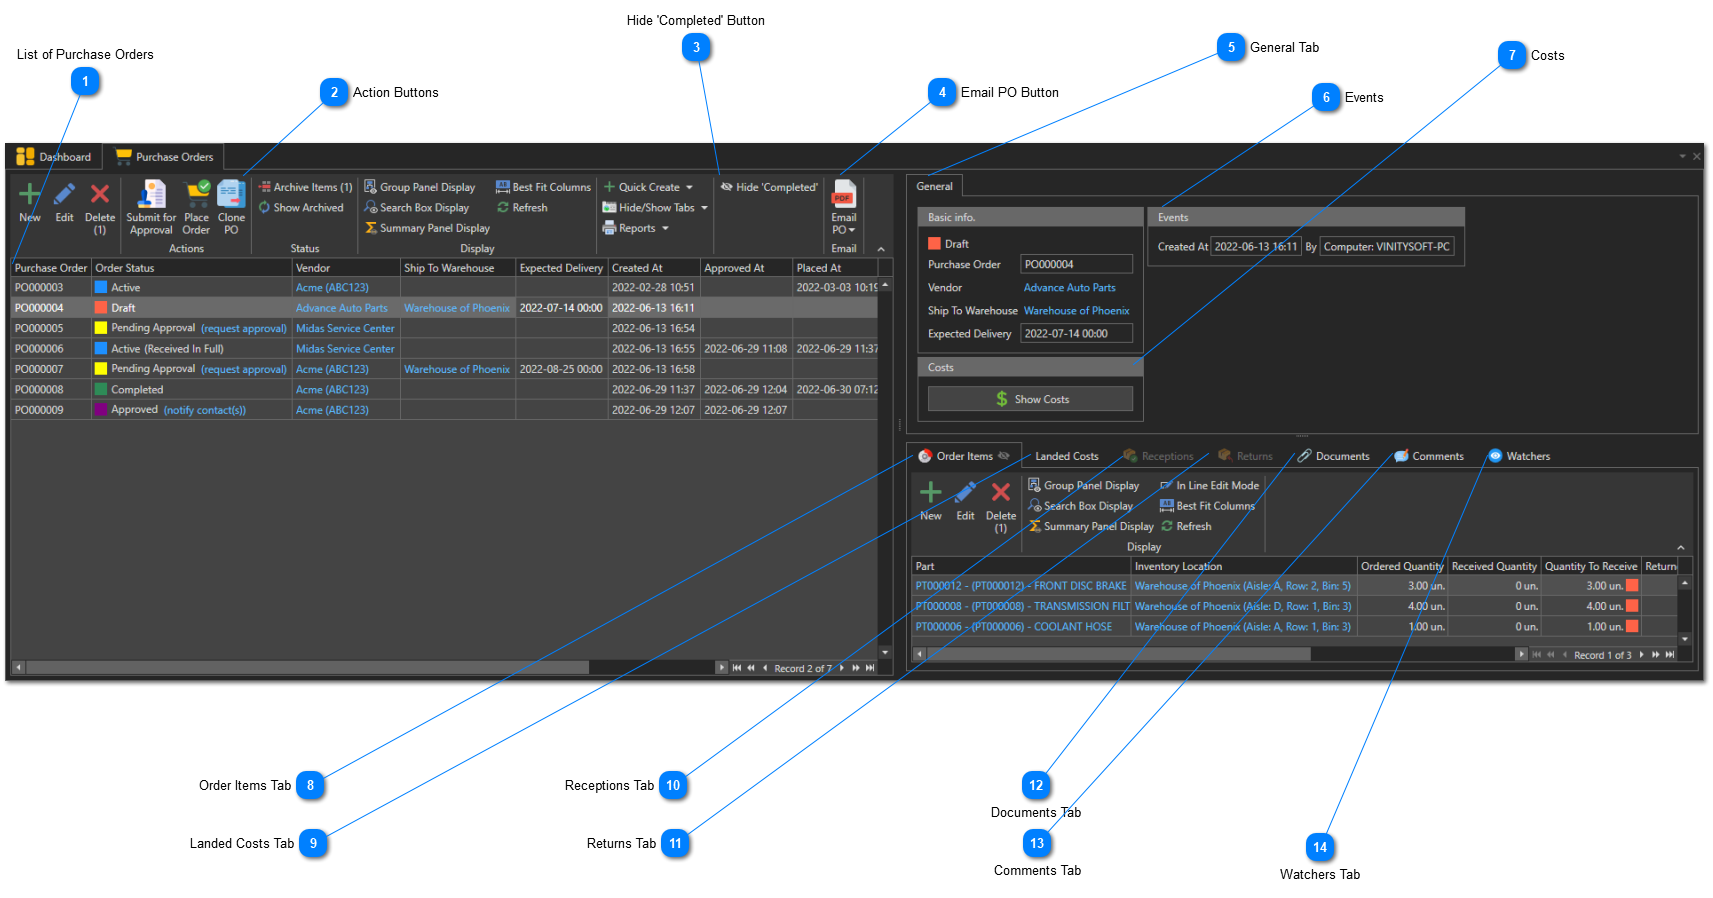
The buttons displayed when the status of the selected purchase order is "Draft"
-
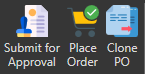
"Submit for Approval" Button : Use this button to request approval for this purchase order. Only a user authorized to approve purchase orders can approve a purchase order. A user must have the "Purchase Order - Can Approve" role to be able to approve purchase order. You can modify a user's roles via the user form: 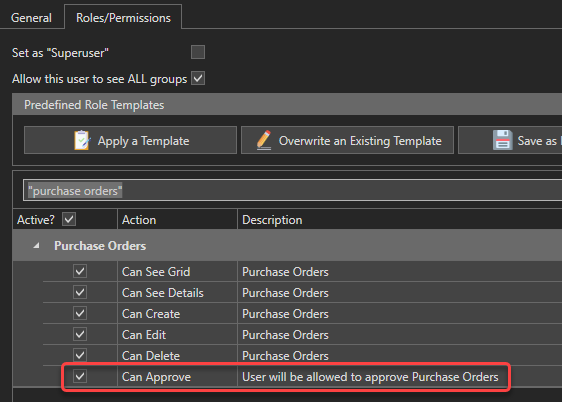 See this article to learn how to modify a user's roles. After submitting the PO for approval, PO status will change to " Pending Approval" and a dialog box will ask you if you want to send a notification to specific user(s).
-
"Place Order" Button: Use this button to place the order with the vendor. After placing the order, the status will change to " Active". If the supplier has a valid email address, a dialog box will ask you if you want to send them a pdf of the purchase order.
-
"Clone PO" Button: You can use this button to clone a purchase order. The new purchase order will contain the same items and its status will be " Draft".
The buttons displayed when the status of the selected purchase order is "Pending Approval"
-
"Approve Order" Button: Use this button to approve a purchase order pending approval. The purchase order status will change to " Approved" and a dialog box will appear asking if you want to send a notification to one or more users to notify them that this purchase order has been approved. You must have the "Purchase Order - Can Approve" role to be able to approve a purchase order. See this article to learn how to modify the roles of a user.
-
"Clone PO" Button: You can use this button to clone a purchase order. The new purchase order will contain the same items and its status will be " Draft".
The buttons displayed when the status of the selected purchase order is "Approved"

-
"Place Order" Button: Use this button to place the order with the vendor. After placing the order, the status will change to " Active". If the supplier has a valid email address, a dialog box will ask you if you want to send them a pdf of the purchase order.
-
"Clone PO" Button: You can use this button to clone a purchase order. The new purchase order will contain the same items and its status will be " Draft".
The buttons displayed when the status of the selected purchase order is "Active"
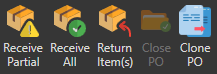 -
"Receive Partial" Button: Use this button to create a partial reception of items. A reception form will open. Enter the reference number, the date as well as comments (optional) about the reception: 
Click this button to save and close the reception's form. The list of purchase order items will appear so you can select the items to include in this reception: 
-
"Receive All" Button: Works the same as the "Receive Partial" button, except that all items will be selected by default in the item list: 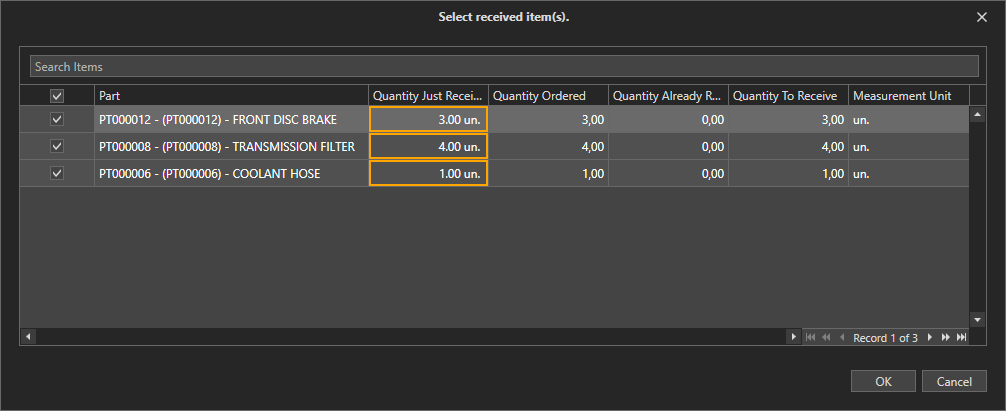
-
"Return Item(s)" Button: Use this button to return item(s) to the supplier. A return form will open. Enter the reference number, the date as well as comments (optional) about the return :  Click this button to save and close the return's form. The list of purchase order items will appear so you can select the items to include in this return: 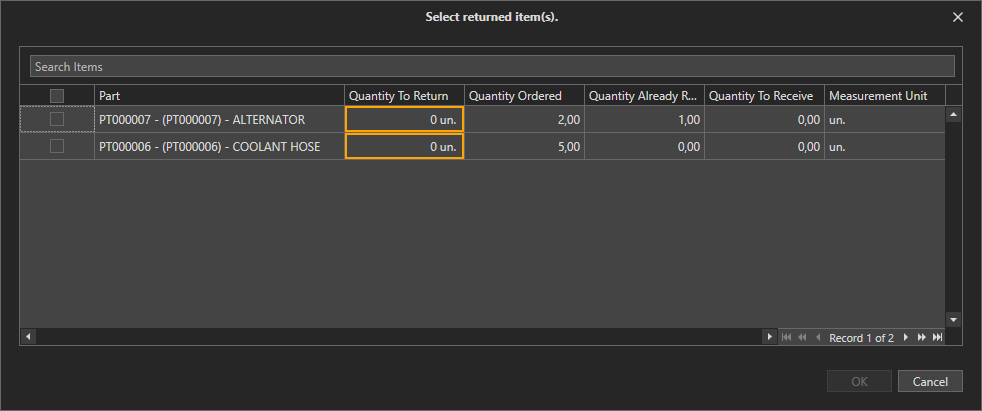
-
"Close PO" Button: If the order has been received in full, you can use this button to close the purchase order. The purchase order status will change to " Completed". It will no longer be possible to make changes to this purchase order.
-
"Clone PO" Button: You can use this button to clone a purchase order. The new purchase order will contain the same items and its status will be " Draft".
The buttons displayed when the status of the selected purchase order is "Completed"

-
"Clone PO" Button: You can use this button to clone a purchase order. The new purchase order will contain the same items and its status will be " Draft".
|
 Hide 'Completed' ButtonUse this button to hide completed purchase orders in the list of purchase orders.
|
 Email PO ButtonUse this button to email the selected purchase order in PDF format to the vendor or other contacts.
|
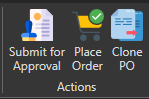
 General TabThis tab displays information about the purchase order that is currently selected in the list of purchase orders.
|
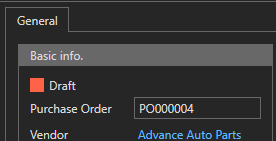
 EventsThis box contains the list of events concerning the selected purchase order.
|
 CostsUse the "Show Costs" button to see the costs related to the selected purchase order. A table similar to this will appear: 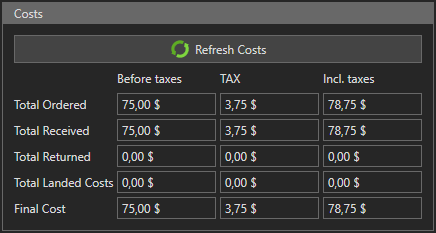 |
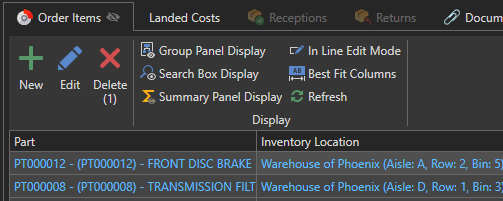
 Order Items TabThis tab contains the list of items (parts) belonging to the selected purchase order. You can add, modify or remove parts from this list using the following buttons:
|
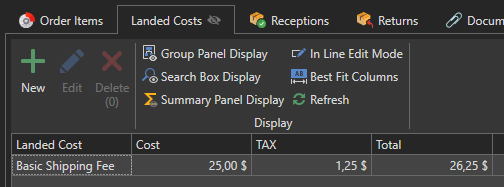
 Landed Costs TabUse this tab to add non-item charges to the purchase order. These may be, for example, transport, customs or other costs.
|
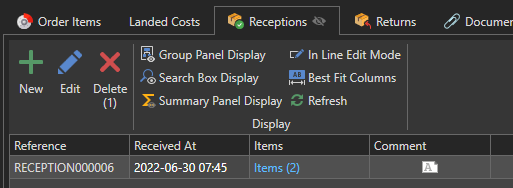
 Receptions TabUse this tab to view, add, edit, or delete receptions associated with the selected purchase order.
|
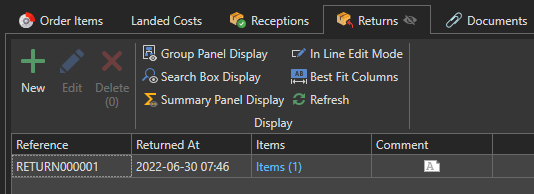
 Returns TabUse this tab to view, add, edit, or delete returns associated with the selected purchase order.
|
 Documents TabUse this tab to view, add, modify or delete documents associated with the selected purchase order. Take note that only file paths, not full files, are saved in the database. It is therefore important to choose an access path or a URL that will be accessible to all your users.
|
 Comments TabUse this tab to view, add, modify or delete comments related to the selected purchase order.
|
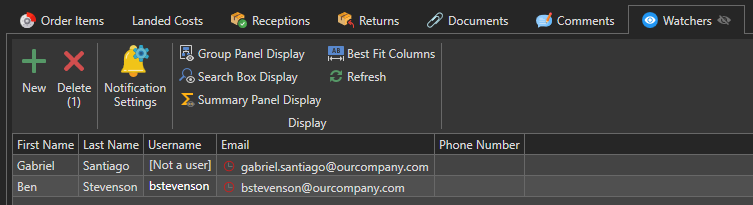
 Watchers TabUse this tab to view, add, or remove watchers from the selected purchase order. Depending on their Notification Settings, watchers may receive notifications when a comment is added to a PO or the status of a PO changes. They will also be able to receive a daily report of overdue purchase orders.
|
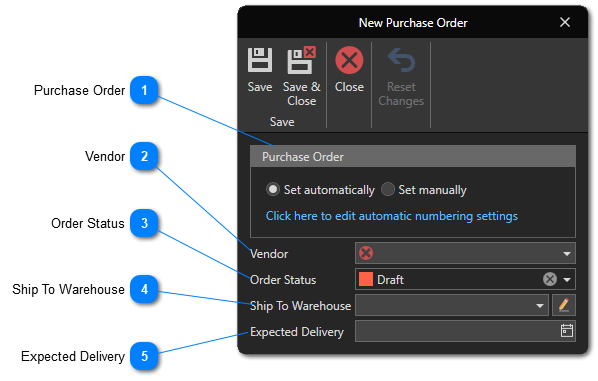
Use the "New" button to open a new purchase order form:
Purchase OrderIndicate the purchase order number. This number must be unique.
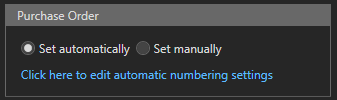
There are two possible options for determining the PO number:
1. Set Automatically : The PO number will be determined automatically according to the automatic numbering settings. To change automatic numbering settings, click  . See this article to learn how to configure automatic numbering settings.
2. Set Manually : A box will appear where you can enter the PO number manually.
|
VendorThe vendor you will place this order with.
|
Order StatusThis field cannot be modified from this window. Please use the action buttons in the list of purchase orders to change the status of a purchase order. |
Ship To WarehouseSelect the warehouse to which this order should be sent.
|
Expected DeliveryThe expected delivery date for the order.
|
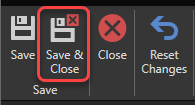
Click this button to save and close the purchase order's form:
|